Account Settings
Account customisation is only available to Logins with admin rights and if that's you then you're free to go ahead and customise a range of settings within your account so that it's more personalised and operates in a way that suits you best.
Account admins are able to customise account settings, set the branding options for logo & colours and also provide colleagues with permission based access to the service.
Managing Account Settings
- Select "Account Settings" from the drop down menu in the top navigation bar.
- Customise the available settings.
- Click "Save Changes".
API keys can also be generated from within the Account Settings screens.
Branding Options
Changing the logos and colours for your account is accessible through the "Account Settings" screen, follow the same steps as above to locate these options.
The options you choose take instant effect once the changes are saved so it's advisable to make a note of the current settings before saving in case you want to revert to the earlier version.
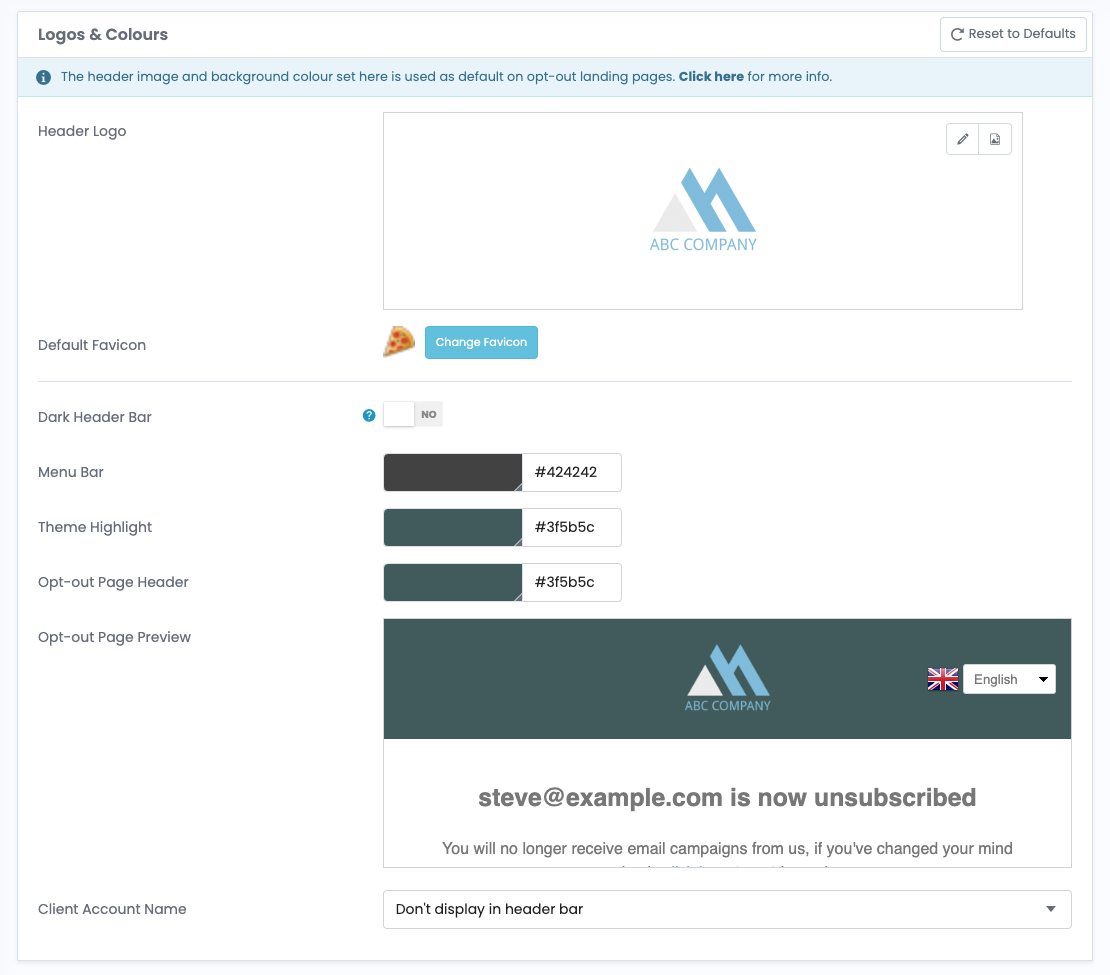
When uploading images be sure to use high quality transparent PNGs that have been optimised for faster loading times.
![]()
You can adjust how your logo displays within your account by using the built-in image editor to adjust the colour, orientation, dimensions and also crop your logo as required. Once your image has uploaded click the 'Edit Image' link to bring up the built-in editor.
Custom Domains
Custom domains are an important part of building Sender Reputation and it is recommended that you don't "share" generic domains with other senders because it may harm your deliverability and engagement rates.
Setting up custom domains is a simple process using just a few DNS records and it means the emails you send will be completely branded to you and will provide your audience with a much better user experience.
For more information on how to setup custom domains, click here.
Secure Login Access
Set-up an unlimited number of Logins to enable permission based access for colleagues or any other authorised contact.
- Select "Manage Logins" from the drop down menu in the top navigation bar.
- Click the "Add New Login" button in the top right
- Use "Admin rights" to grant unrestricted access or set individual permissions.
- Click "Save Changes".
Permissions
To control access to features and data, permissions can be set individually for each Login and there's also the option to select a pre-defined set of permissions by choosing a Login Role.
Take a look here to find out more about how permissions map onto the control of features and access to personal data.
Data Retention Settings
To view the Data Retention rules go into the account settings screen and click on Data Retention in the sidebar.
Each rule is listed separately and displays the period of time each type of data is stored for along with any automated actions that take place upon period expiry.
If you would like to discuss customising these settings please contact support.
User Feedback & Complaints
When Users mark emails as junk some of those complaints are processed automatically but for Yahoo, any sending domains being used will require registration on their CFL.
Some complaints may be received when people directly email abuse@yourdomain.com and when that happens they automatically get forwarded onto the abuse email address specified under your Account Settings.
The generic opt-out landing page also provides a link for people to provide feedback or to report cases of abuse. Feedback provided through that form is forwarded on to your account abuse email address and they are also listed in the reports for Campaigns and for Automation.
Sub-accounts
Where enabled, this feature allows for setting up additional accounts that are linked to your primary account.
Useful for scenarios where there is a need to separate data & content for multiple locations, brands, departments etc.
Login access can be restricted to specific accounts and it allows for the secure management of projects within teams.
To find out more about the Sub-accounts feature please get in touch.
Developer API
To view, regenerate or revoke API access keys go into the account settings screen and in the sidebar click on 'API'.
API access keys changes are recorded in a log that contains the date & time, who made the change and the source IP address from where the change was made.
Click here to read more about the developer API.